Review: Cadbury Milk Baking Block

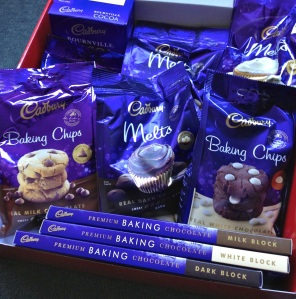
Since the last update, Cadbury Kitchen sent me a sample from Cadbury’s Real Chocolate baking range. This I believe is my very first perk of food blogging and hey, who doesn’t like free chocolate?? With such a selection at hand, I wondered, can you make ice cream with real chocolate? The answer of course is yes!  The product I chose from the box was the Milk Baking block.

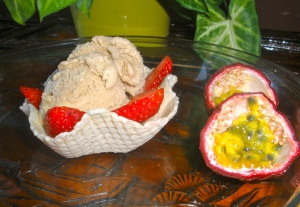
I think with the effort that it takes to make ice cream at home, you should make it interesting and make a flavour that cannot be purchased. So to make chocolate ice cream a little more interesting, I added golden syrup. The chocolate aspect is more subtle than plain chocolate ice cream is, but oh boy is this ice cream heavenly for a simple flavour combination. THe recipe makes about 1.6 or 1.7 litres.

If you’re looking for more information on Cadbury’s baking range of chocolate, check out the Cadbury Kitchen page, which also has a whole lot of recipes and tips and techniques for chocolate.

There a few things to take note of in this recipe:

The first one, where it says to stir constantly, you do actually need to stir constantly. For example, in the first step if you just stir occasionally until melted, the ingredients won’t combine fully and the mixture won’t be smooth enough.

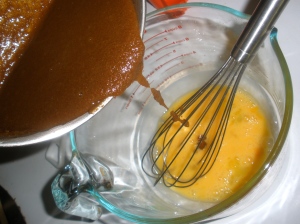
The second one, once the mixture has been boiled and needs to cool before it’s added to the beaten eggs, make sure it is cool enough. If it isn’t, the heat will cook the eggs a little and you really don’t want that!

And thirdly, this recipe will take a couple of hours from start to finish

300ml milk

100g milk chocolate, broken into pieces

25g butter, chopped

1tsp vanilla extract

125g caster sugar

3 tbsp golden syrup

2 eggs

300ml thickened cream

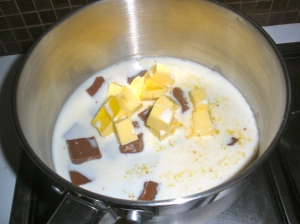
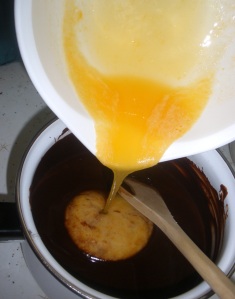
Pour 175ml of the milk into a heavy-based saucepan. Add the chocolate, butter and vanilla to the milk

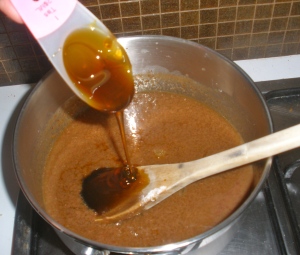
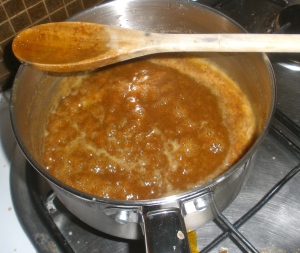
and heat gently, stirring all the time, until it’s melted and smooth. Stir in the sugar and golden syrup

and heat until the mixture boils. Reduce the heat and simmer for 4 minutes, without stirring.

Remove from the heat and leave to cool.

Put the eggs in a bowl and beat. Slowly add the chocolate mixture, stirring all the time with a wooden spoon.

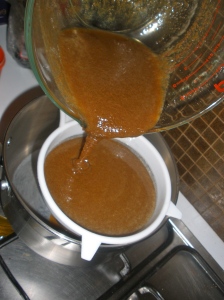
Strain the mixture back into the rinsed out saucepan

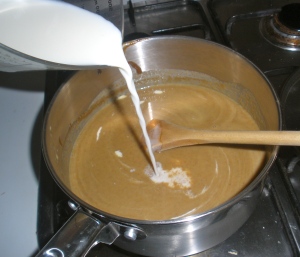
and cook over a low heat for 10-15 minutes, stirring all the time, until the mixture thickens enough to coat the back of the wooden spoon. Do not allow the mixture to boil or it will curdle. Remove the custard from the heat and stir in the cream and remaining milk.

Leave to cool for at least an hour, stirring from time to time to prevent a skin from forming.

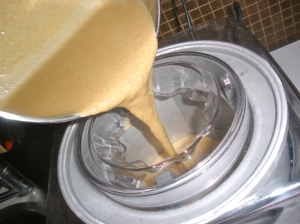
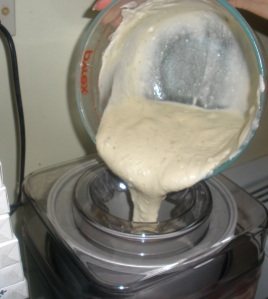
Pour the custard into the (prepared earlier) ice cream maker to churn.

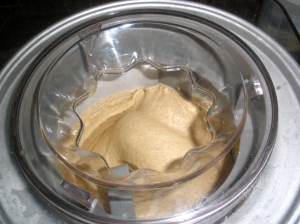
This took about 25 minutes in my ice cream maker.

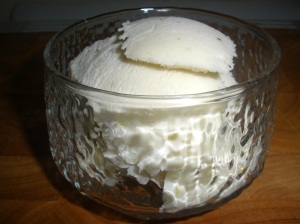
Once it’s churned into ice cream, pour it into freezer-safe container, smooth the top and cover the surface of the ice cream with cling wrap before putting on the lid, and freeze for 2-3 hours before serving.  The cling wrap is to prevent ice crystals from forming on the surface of the ice cream.

The Accidental Hiatus

Well it certainly has been quite a while, almost 3 months infact, since I last posted to this blog. I didn’t intend to take a break after I moved across Melbourne, but that’s what has happened. It’s just taken a while to get back into the swing of things. After I’d moved, I realised it was small electric oven, not gas as I had thought. I only used the oven for the first time earlier this week to make yogurt & crumbed chicken strips, which were fabulous.

Since moving I have made a cheesecake slice and chocolate mousse and the recipes will be up in due course. In the mean time, I have two recipes from before the move to put up, a coconut slice and baby rooster cupcakes, and these will be up in the next week or so.

Hopefully during the hiatus you’ve had a chance to read the reviews on imakecake eats Melbourne that I’ve completed of a number  of establishments found in the 2011 edition of The Age Cheap Eats. If you have you’ll notice that I’m running behind there too. Aahh life feels so busy sometimes!

Norwegian Apple Cake

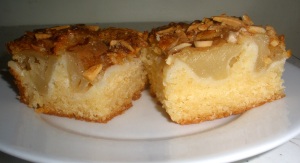
After I’d made this recipe a couple times I thought I should do a little investigation and see whether it had anything in common with Norway’s ‘Eplekake’. While I’m not Norwegian, I think the main elements are there -sponge cake made with a mixture of hot milk and butter, a crunchy cinnamon topping and of course the apple slices.

When preparing the cake, take care not to over mix when incorporating the hot milky mixture into the creamed egg/sugar mixture, or the cake will have a peaked instead a flat top.

Do use a metal spoon, not a wooden spoon,  when folding the flour into the cake mixture as this will keep the batter aerated and ensure a lighter sponge cake.

2 large pink lady apples

2 eggs

1 cup caster sugar

125g butter, chopped

2/3 cup milk

1 1/2 cups self raising flour

1/3 cup slivered almonds

ground cinnamon

2tsp demerara sugar

~ * ~ * ~

Preheat the oven to 180C. Grease and line a 15x20cm lamington pan with baking paper, allowing the edges overhang for use as handles.

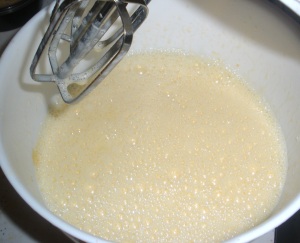
Use an electric mixer to beat eggs and sugar in a bowl until pale and creamy. Set aside.

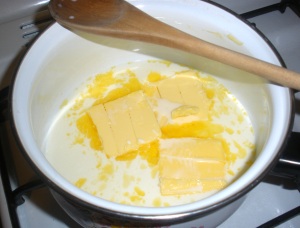
In a small saucepan, heat the butter and milk

until the butter melts and the mixture just comes to the boil.

Gradually add the butter mixture to the egg mixture, beating until well combined.

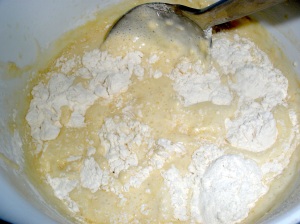
Sift over the flour and use a metal spoon to fold through until just combined.

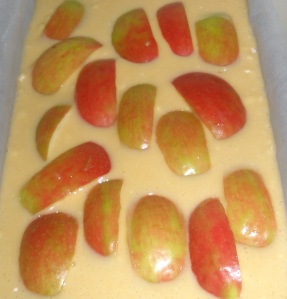
Pour the cake batter into the prepared pan. Core and cut apples in half and then into thirds. Arrange the apples slices over the cake mixture.

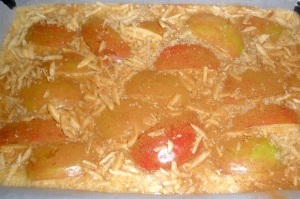
Sprinkle with almonds, dust with cinnamon and sprinkle with demerara sugar.

Bake in the prepared oven for 45 minutes or until a skewer inserted into the centre comes out clean. Set aside in the pan to cool. Remove cake from the pan and use a serrated knife to cut it into slices.

Banana & Pecan Cupcakes

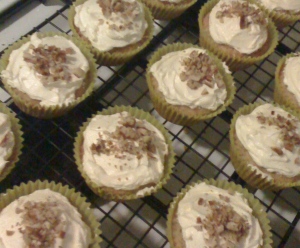
I know bananas are still pretty expensive right now. But if you happen to have a couple of well ripened bananas lying around, why not put them to good use in this lovely recipe.

Cakes

225g plain flour
1 ¼ teaspoons baking powder
¼ teaspoon bicarbonate of soda
2 bananas
115g butter, roughly chopped and softened
½ teaspoon vanilla extract
2 eggs
4 tablespoons sour cream
55g pecans, chopped

Lemon Icing

135g butter, roughly chopped and softened
2 ½ cups icing sugar
juice of ½ a lemon
25g pecans, finely chopped

Preheat oven to 190C.  Line a 12 1/3 cup capacity muffin tray with paper cases.

Sift flour, baking powder and bicarbonate of soda together into a mixing bowl, then set aside. Peel and roughly chop the bananas into a small bowl, mash with a fork and set aside.

Using an electric mixer, cream butter, sugar and vanilla extract until light and fluffy. Add eggs, 1 at a time, beating well after each addition. Mix in mashed banana and sour cream with a wooden spoon.

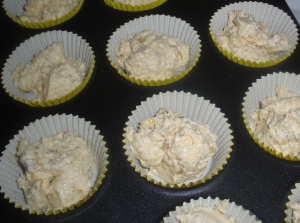
Using a wooden spoon, fold in the flour mixture and chopped pecans.  Spoon a heaped tablespoon of mixture into each of the prepared paper cases.

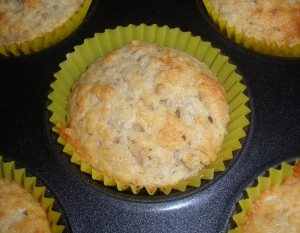
Bake cupcakes in the preheated oven for 20 minutes, or until well risen and golden brown.

Turn out onto a wire rack to cool

Lemon Icing:

Beat butter with an electric mixer until fluffy.  Sift icing sugar over the top and add lemon juice. Beat until combined.

Spread icing on top of each cupcake and sprinkle with finely chopped pecans before serving.

Cheesecake Brownies

I was genuinely surprised that I hadn’t already posted this recipe, and only realised this oversight while looking for things to make for the Biggest Morning Tea event we held at work. These brownies were one of the three items I chose to make, another were the Coconut Ice Cakes, with hot pink icing, which I’ve blogged about before and Norwegian Apple Cake which will be blogged about sooner or later.

Pro tip: I have found that the chocolate mixture sets while the cream cheese mixture is made. If this occurs, just put the chocolate mixture (still in the saucepan) back onto the stove on the lowest heat and stir constantly until it has returned to a spreadable consistency. This will only take a couple of minutes.

150g butter, chopped

300g dark chocolate, broken into pieces

3 eggs

1 cup caster sugar

1 1/2 cups plain flour

1/4 cup sour cream

250g cream cheese, chopped and at room temperature

≈ ≈ ≈

Place the butter and chocolate in a saucepan over a low heat.

Stir for 5 minutes or until the chocolate and butter have melted and the mixture is smooth. Set aside for 5 minutes to cool.

Whisk 2 of the eggs in a small bowl then add to the chocolate mixture

along with 2/3 cup of sugar to the chocolate mixture and stir to combine. Add sifted flour and sour cream and mix until well combined.

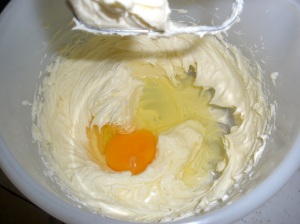
In a separate bowl, use an electric mixer to beat the cream cheese and remaining sugar until smooth. Add the remaining egg and beat until just combined.

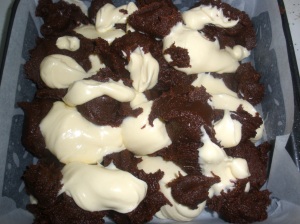
Spoon the chocolate and cream cheese mixtures alternately over the base of the prepared pan.

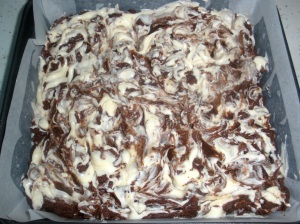
Use a skewer to swirl the mixtures to create the marbled effect.

Bake in an oven for 35-45 minutes or until a skewer inserted into the centre comes out clean. Set aside in pan for 1 hour to cool. Cut into squares to serve.

Coconut & Lime Ice Cream

The first thing I attempted to make with the ice cream maker was pear sorbet.  While the mixture fluffed up like it should, I hadn’t been able to process the pears into a proper puree, so there were small chunks of fruit in the resulting sorbet.

After that I thought I would try an ice cream recipe instead, and when I found a number of ice cream recipes a little Valentines Day mini recipe book, I decided to give this one a go.

The number of limes you’ll need depends upon the size and juiciness of the fruit, but I used 5 and softened them before juicing, rolling them around on a chopping board before I halved them. The length of time to churn the ice cream will depend upon the machine you have, but this took about 20 minutes for me. After churning, you’ll find the lime flavour is quite sharp and overwhelming, but after the ice cream has chilled overnight, the taste of lime will have mellowed out.

1 1/2 cups icing sugar

1/2 cup lime juice

zest from 2 limes

300ml pouring cream

270ml coconut cream

In a bowl combine the icing sugar, lime juice and zest. Set aside.

Place cream in the bowl of an electric mixer and beat until soft peaks form. Fold through lime juice mixture and coconut cream.
Place in the fridge to chill.

Pour the ice cream mixture and churn for about 20 minutes. Once done, pour into a container and freeze overnight before serving.

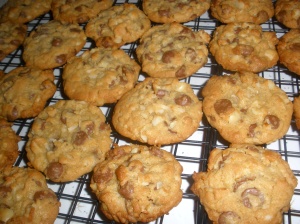
Island Cookies

It’s been a while between posts, hasn’t it? Life’s gotten busy lately. But I have managed to find the time to squeeze in some baking and to have a play with the ice cream maker, at which I have had some success. I suppose it isn’t much of a consolation to know that I’ve got a few recipes here just waiting for me to create the posts, either.

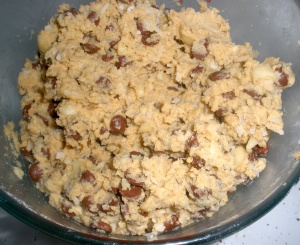
Hopefully this recipe will help. It comes from my favourite cookie cookbook, Best-Loved Cookies, that I found in the North Melbourne newsagent a number of years ago. I recently made these for my mother the last time she visited. Mum loves macadamia nuts and always misses out on my baking because she lives interstate. She loved this variation of the chocolate chip cookie.


1 & 2/3 cups plain flour

3/4 tsp baking powder

1/2 tsp baking soda

1/2 tsp salt

190g butter, chopped and softened

3/4 cup packed brown sugar

1/3 cup caster sugar

1 tsp vanilla extract

1 large egg

1 & 3/4 cups milk chocolate chips

1 cup flaked coconut

3/4 cup chopped macadamia nuts

Preheat oven to 190C oven. Line biscuit trays with baking paper.

Combine flour, baking powder, baking soda and sift together into a bowl. Add salt and set aside.

Use an electric mixer to beat the butter, sugars and vanilla extract in a large bowl until creamy. Beat in egg until combined. Gradually beat in flour mixture. With a wooden spoon, stir in choc chips, coconut and macadamia nuts until well combined.

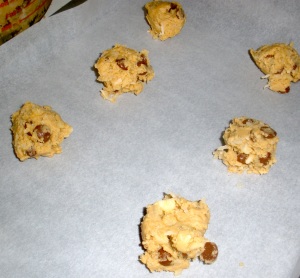
Drop a slightly rounded tablespoon of cookie dough onto the prepared tray.

Bake in preheated oven for 8 – 11 minutes, or until edges are lightly browned. Let stand for 2 minutes, remove to wire racks to cool completely.

Blueberry & Lemon Syrup Cake

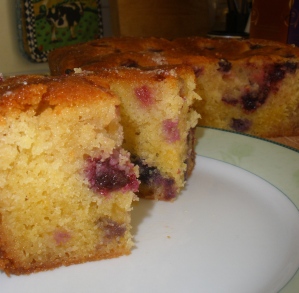
I do have a fondness for fruit in my baking. There are just so many flavour combinations to be made. This lemon syrup cake dotted with whole blueberries makes a lovely dessert. The warm lemony cake is nice and soft and sweet with the syrup soaked all through it.

225g butter, softened
225g raw caster sugar
4 eggs, beaten
250g self raising flour, sifted
1 lemon, zested & juiced
25g almond meal
200g frozen blueberries

LEMON SYRUP
2 lemons, juiced
115g raw caster sugar

Preheat oven to 180C. Grease and line a 20cm square cake tin with baking paper.

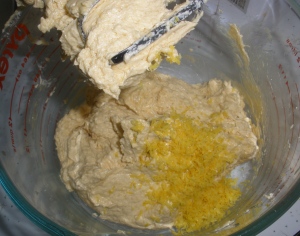
Using an electric mixer, cream the butter and sugar until it’s light and fluffy. Gradually beat in eggs until combined. Beat in the  lemon zest.

Fold through the sifted flour and almond meal with just enough lemon juice to give it a dropping consistency.

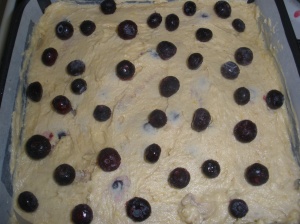
Fold 3/4 of the blueberries through the cake batter and then spoon it into the prepared tin. Smooth the surface and scatter the remaining berries on top.

Bake in preheated oven for about 1 hour, until firm to the touch and a skewer inserted into the centre comes out clean.

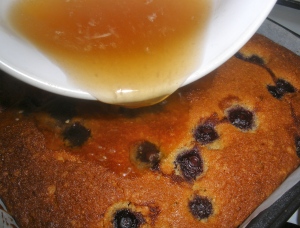
Meanwhile, prepare the syrup: Add lemon juice and sugar into a small bowl and mix together. As soon as the cake comes out of the oven, prick it all over with a skewer and pour over the lemon mixture.

Allow the syrup time to soak into the cake. Remove the cake from the tin just before serving, while it’s still warm. Cut the cake into squares to serve.

Cherry & Citrus Muffins

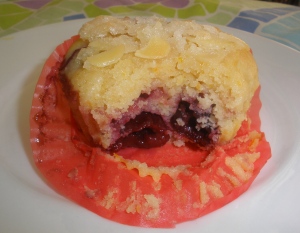
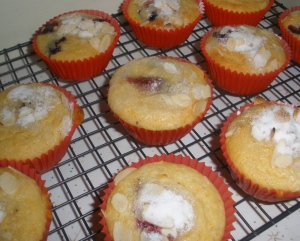
These little muffins are delicately fruity, with lemon and orange flavours and a crunchy top made from flaked almonds and sugar.  Each bite contains a burst of whole cherry which is just wonderfull, if you’re a fan of cherries like I am.
2¼ cups self raising flour
½ teaspoon salt
½ cup olive oil
½ cup milk
¼ cup sour cream
1 lemon, zested & juiced
1 orange, zested & juiced
½ cup caster sugar
300g frozen cherries

TOPPING

¼ cup flaked almonds
¼ cup caster sugar

Preheat oven to 180C. Line a 12 hole 1/3 cup muffin pan with paper cases.
Sift flour and salt into a large mixing bowl.

In a separate bowl, whisk together eggs, oil, milk, sour cream, zests, juices and sugar.

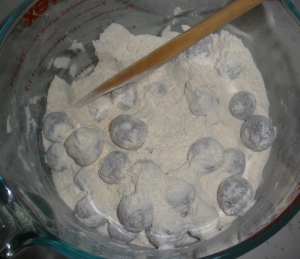
Tip cherries into flour and toss gently to coat.

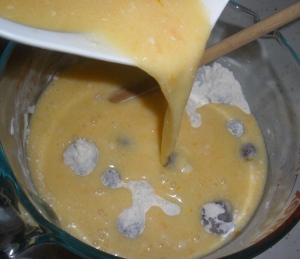
Pour the egg mixture into the flour and cherry mixture and stir until combined.

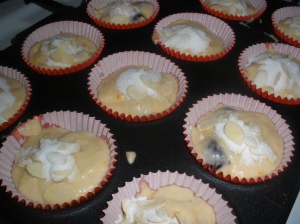
Fill paper cases about 3/4 full of cake batter. Combine almonds and extra sugar in a small bowl, then spoon a little over each muffin.

Bake muffins for 20-25 minutes, until golden and tops spring back when gently pressed. Allow to cool in pan for 1 minute, then turn out onto a wire rack to cool completely.

I Scream You Scream, We All Scream For Ice Cream!

I have some good news and I have some bad news.

Firstly, the bad news: there was an incident involving a large glass of water and my MacBookPro, so I am currently without a computer. Which means that blogging is a bit tricky, but not impossible, until I get a new laptop.

And the good news? I was the winner of Kitchen Wench‘s Easter Ice Cream Maker competition!! The sexy ice cream maker arrived last week and is now awaiting the maiden voyage, so to speak.  Many thanks of course to Kitchen Wench for hosting such a competition and also to Kitchenware Direct for the Cuisinart Ice Cream Maker.

So if anyone can recommend a favourite recipe, or a favourite ice cream cookbook to get the ball rolling that would be great.  Seriously, I can’t wait to start making my ice cream, sorbets and slushy drinks!!